Blux Flutter SDK Integration Guide
Installation
Using pub
Add the Blux Flutter SDK to your project's pubspec.yaml file:
dependencies:
  blux_flutter: ^0.1.3
CocoaPods (iOS-specific)
After adding the SDK, navigate to the ios directory and run the following command to install iOS dependencies:
cd ios
pod install
iOS Project Setup
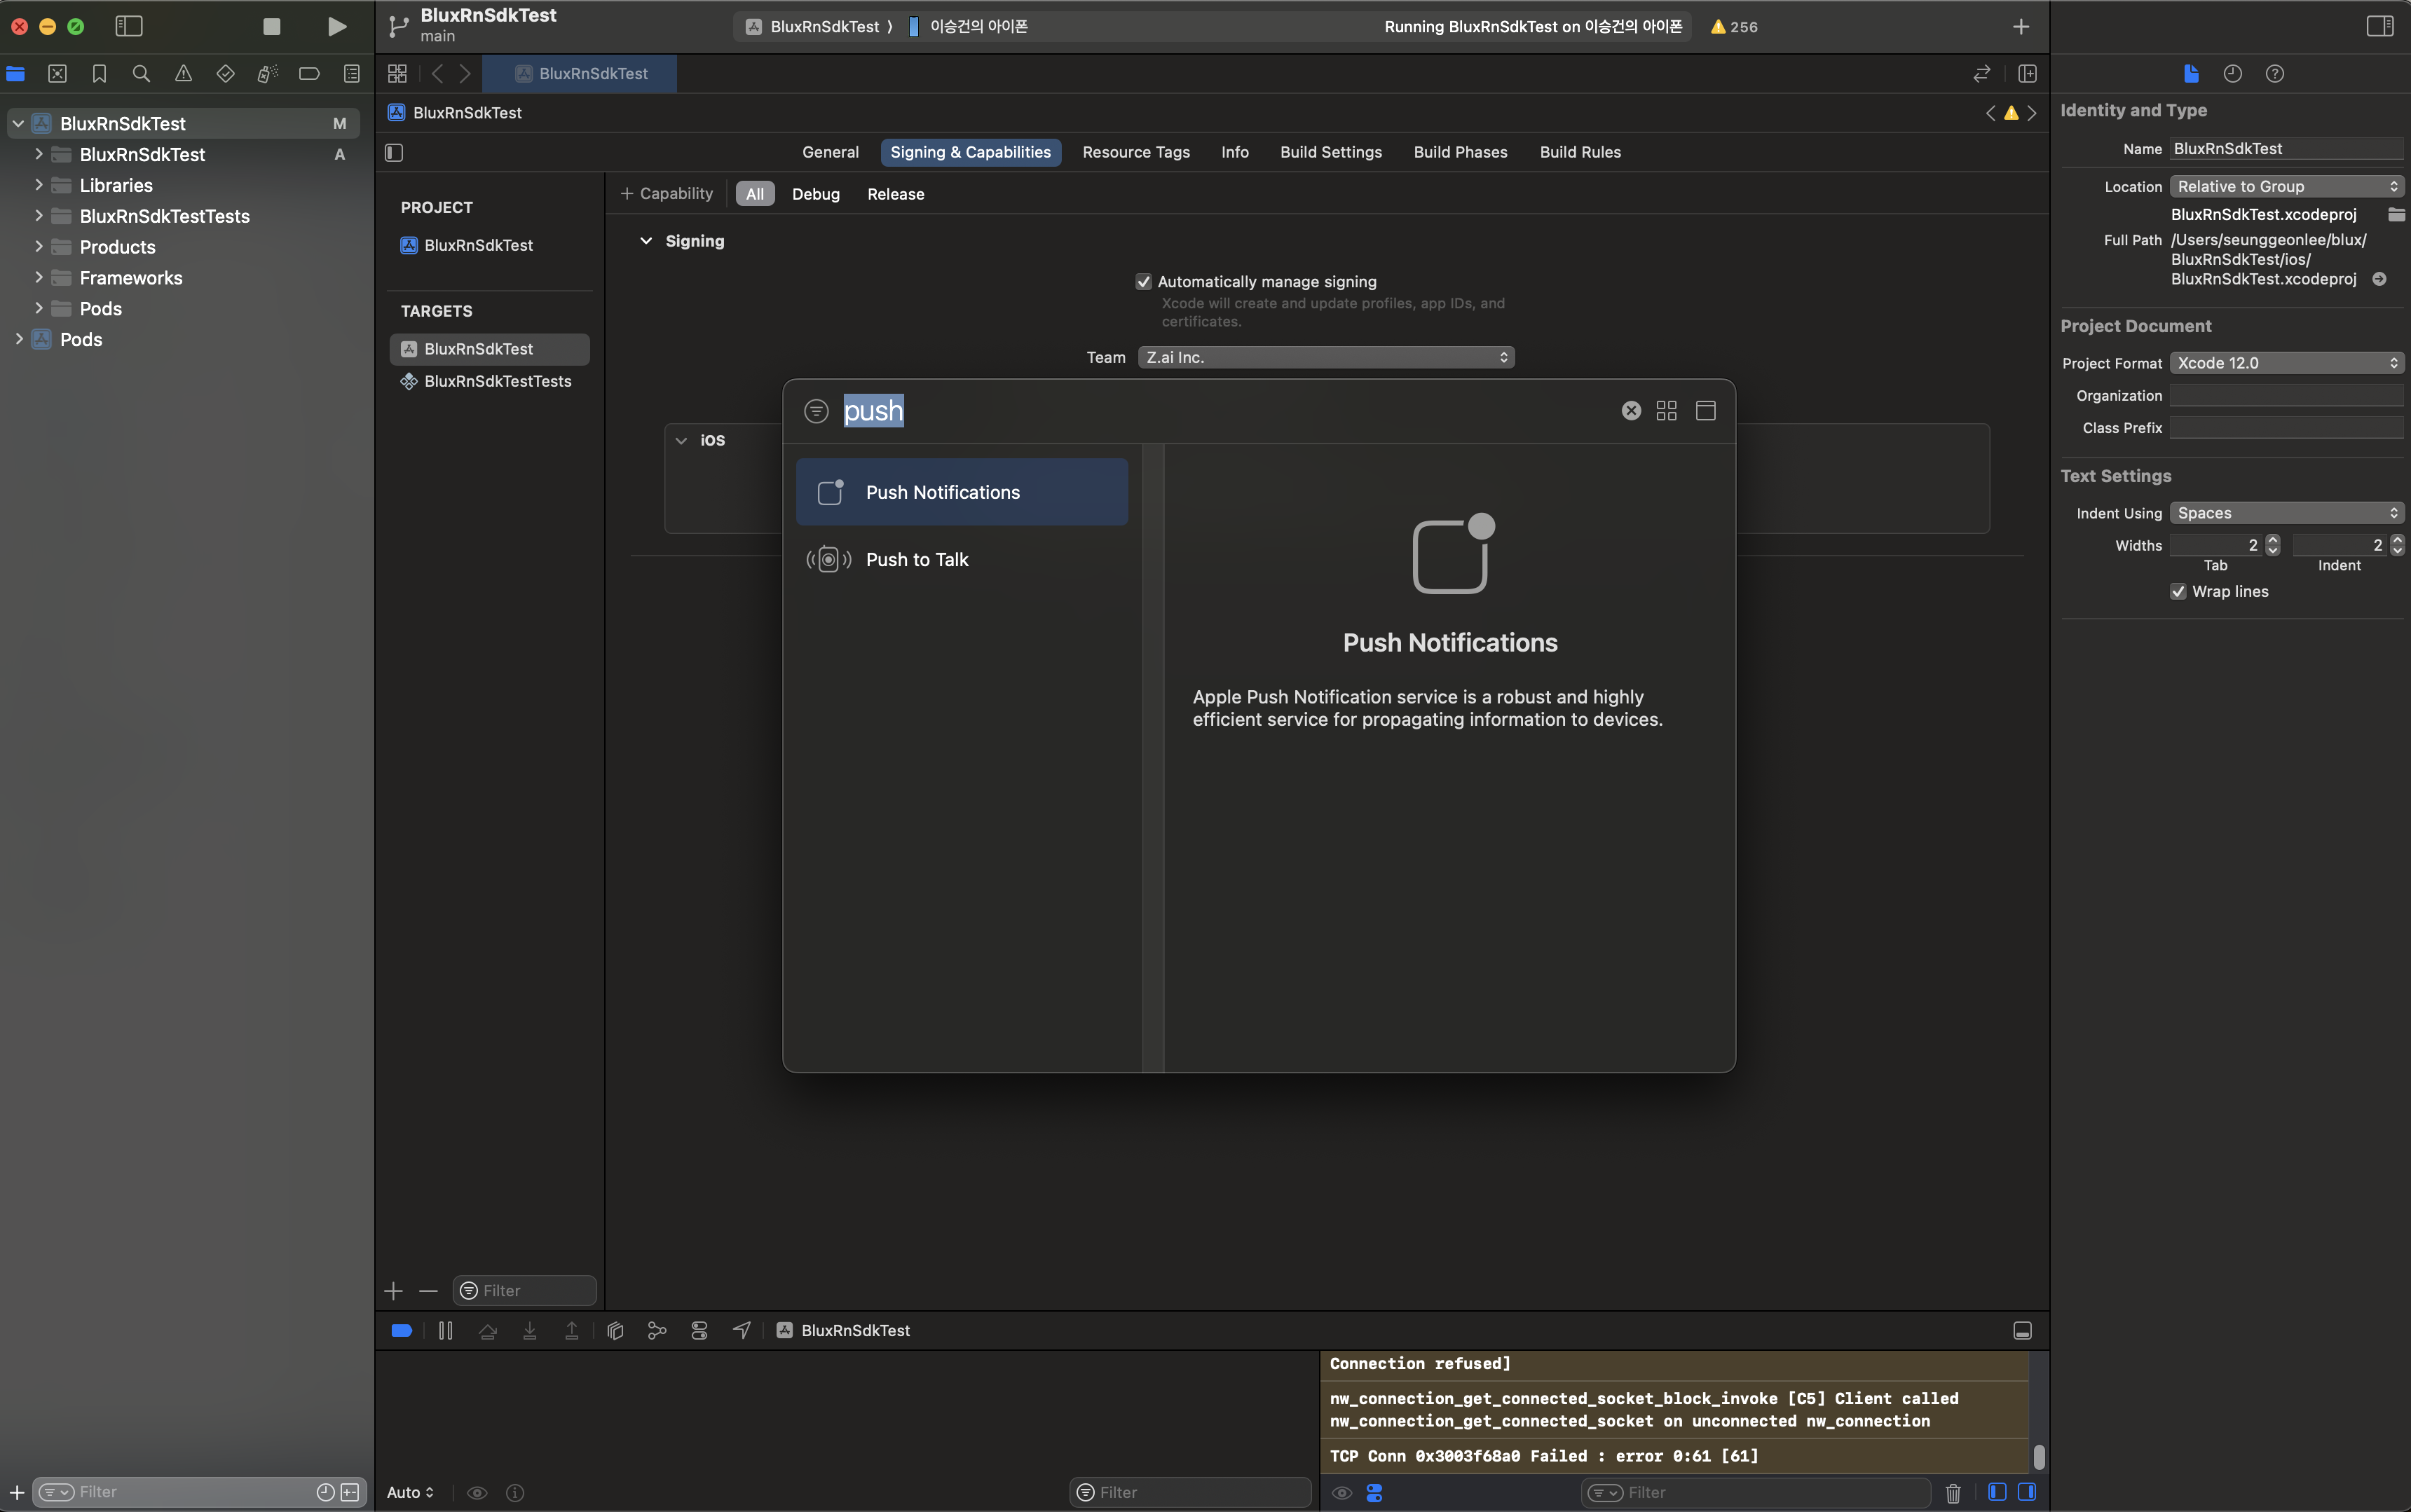
(1) Enable Push Notifications
Enable push notifications by navigating to your Target's Signing & Capabilities, clicking the "+" button in the top-left corner, and selecting Push Notifications.
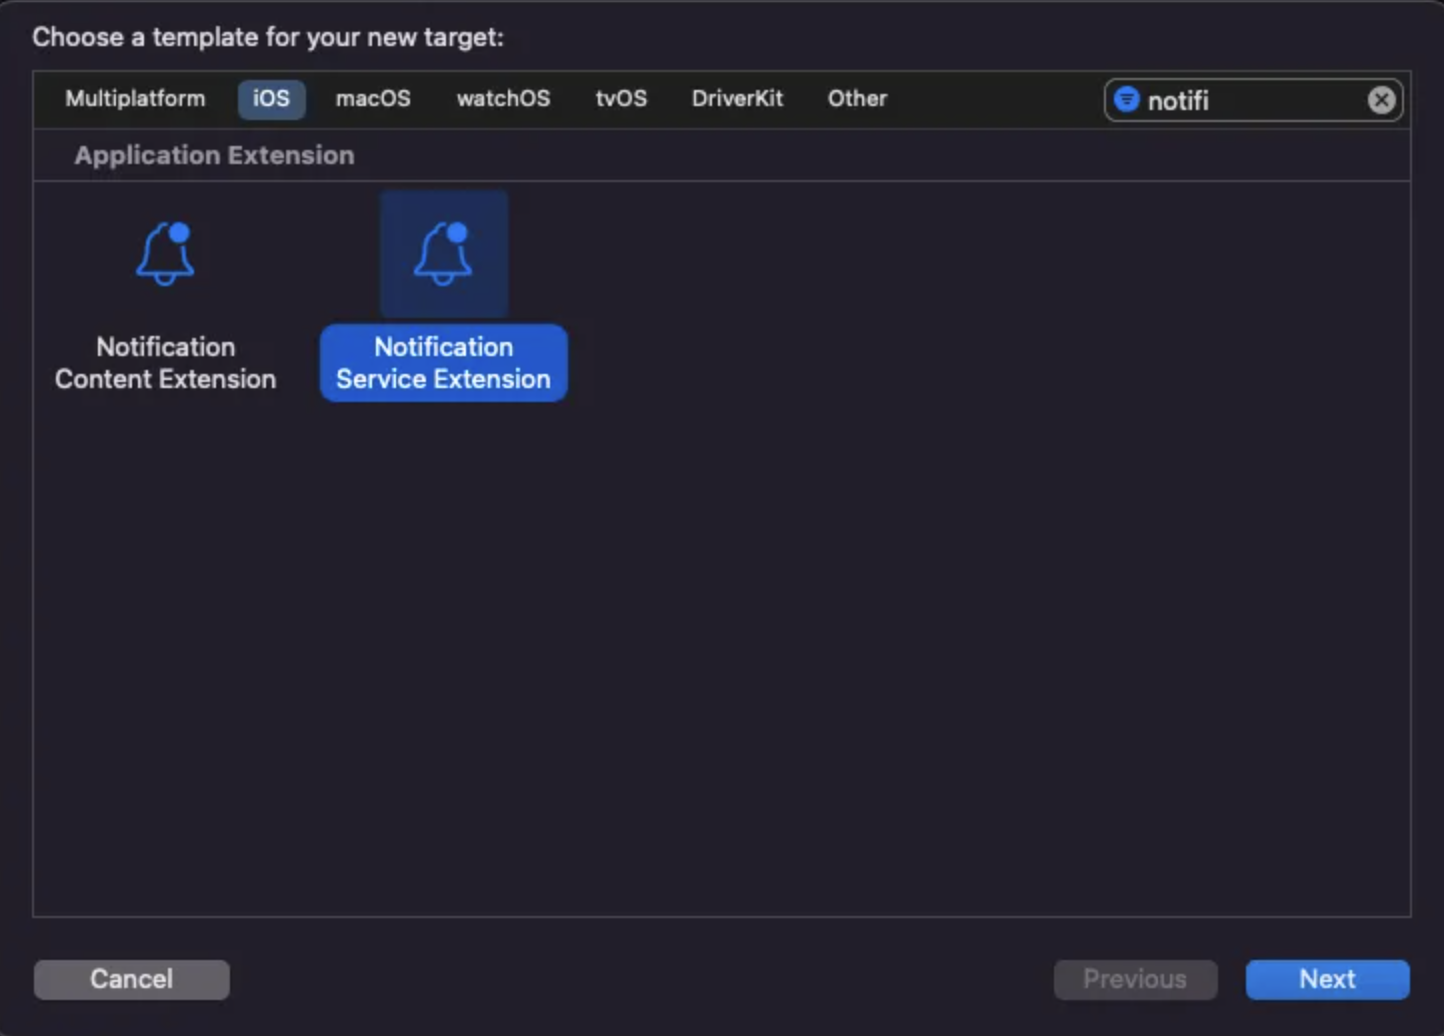
(2) Create a Notification Service Extension
- In Xcode, go to File > New > Target and select Notification Service Extension.

- Enter an appropriate Product Name and click Finish. We recommend using Swift as the language.
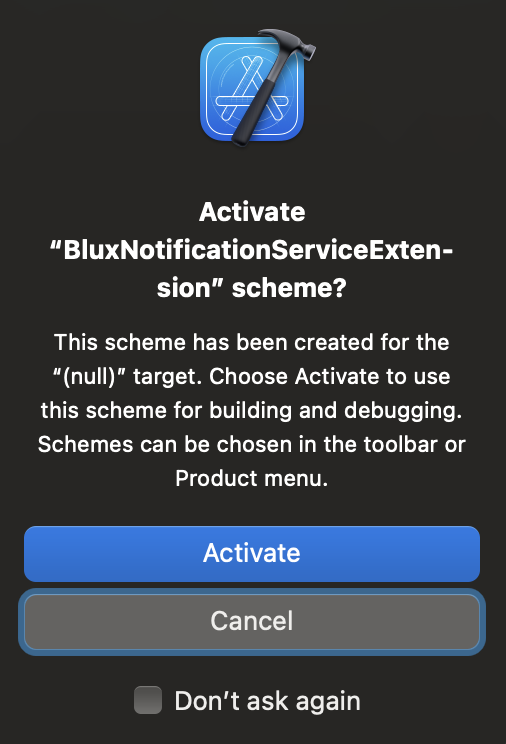
- When prompted with the scheme activation dialog, click Cancel to avoid enabling a separate scheme.
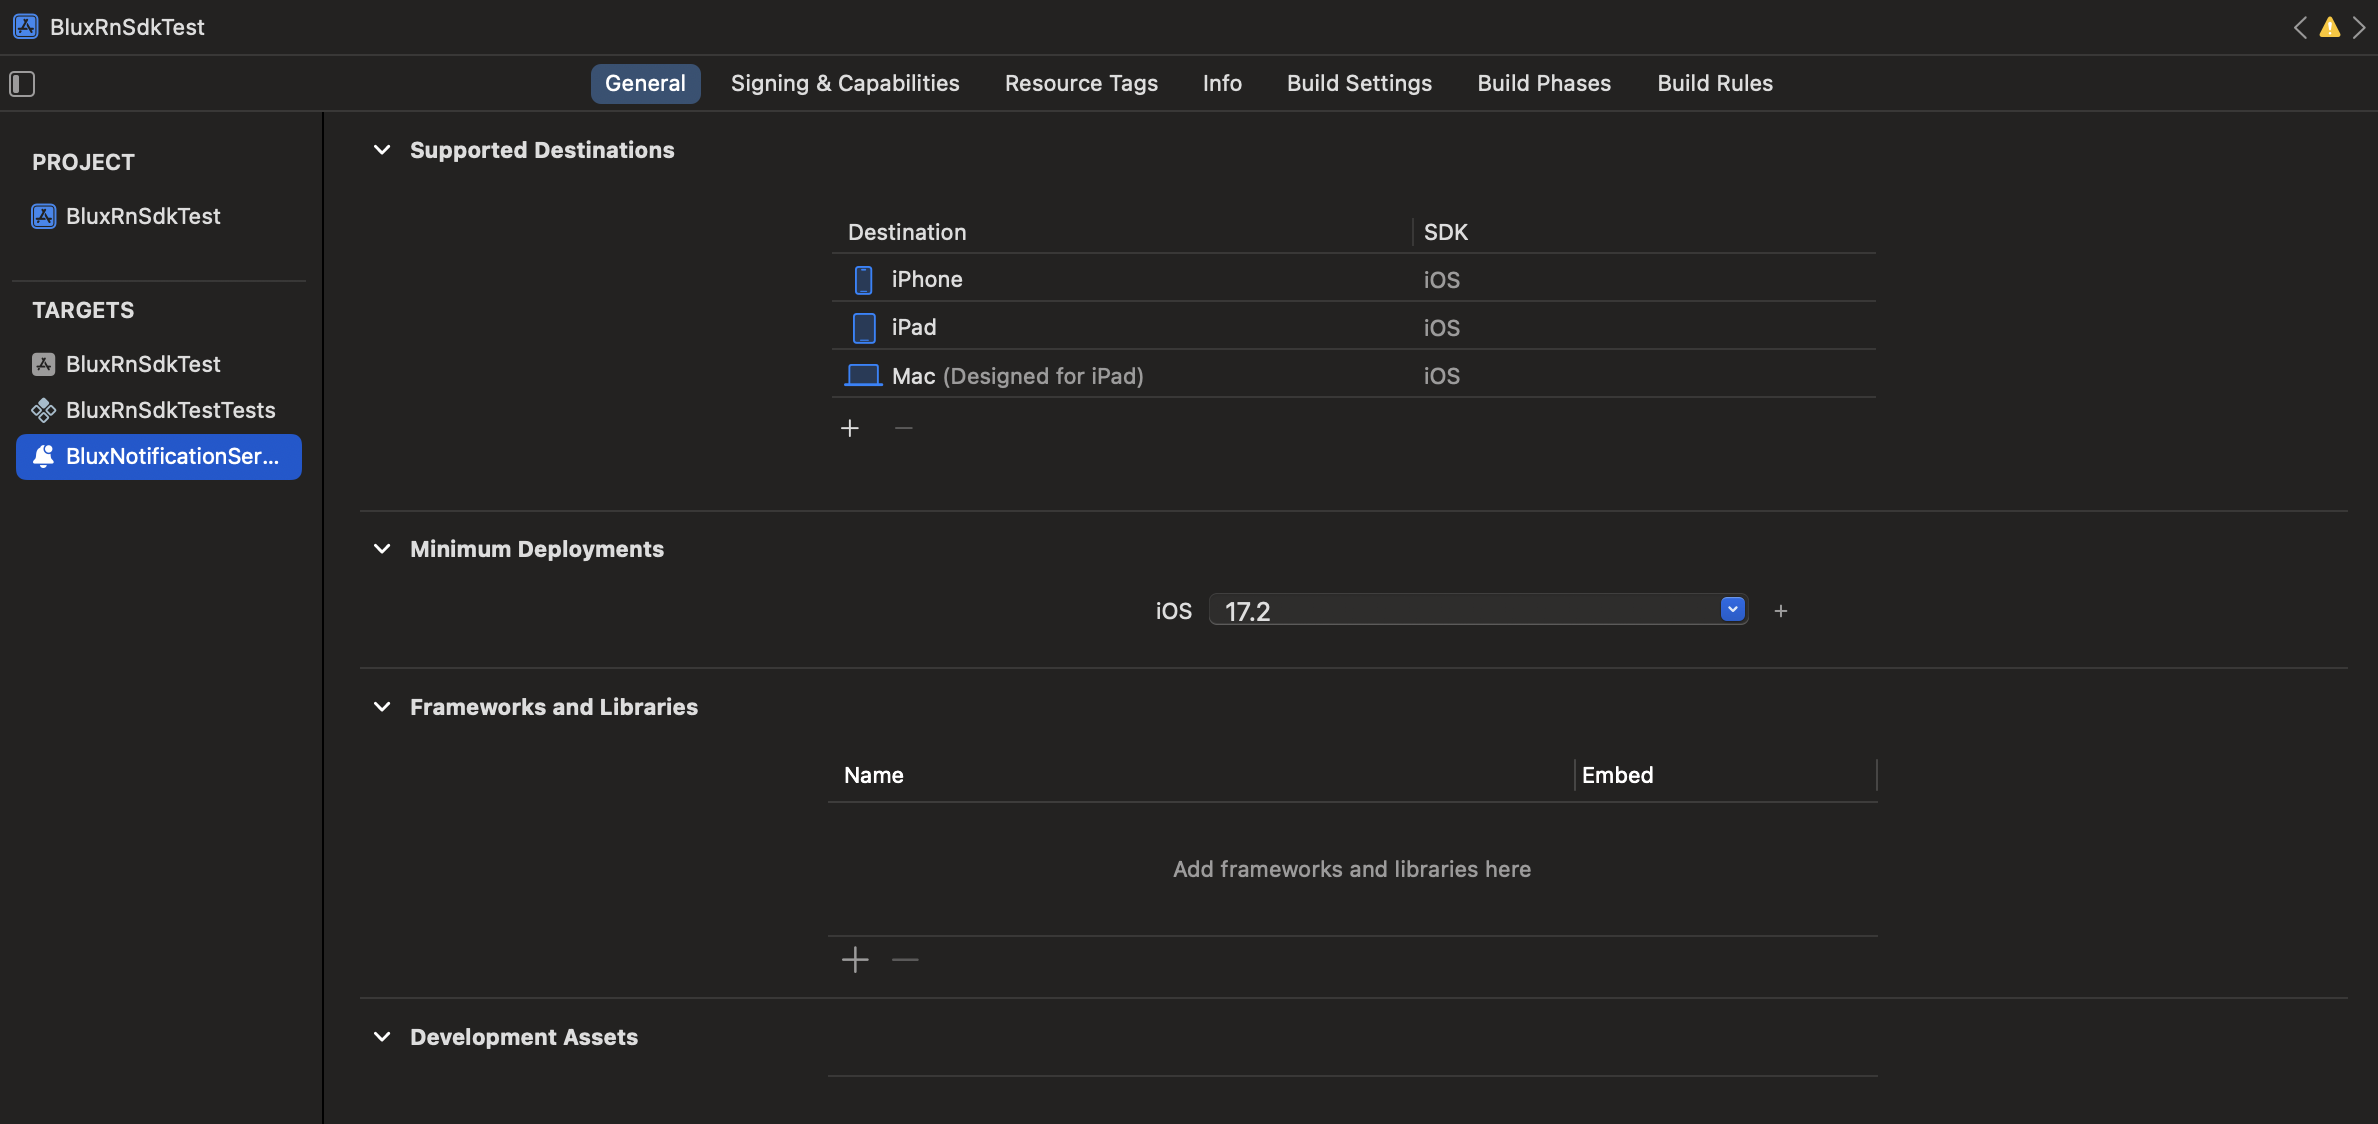
(3) Set Minimum Deployment Version
Ensure the Minimum Deployment Version for the Notification Service Extension matches the deployment version of your main app's Target.
(4) Modify the Podfile
Open the Podfile in the ios directory and add the following lines:
# Add the following at the bottom of the file.
# Use the Product Name you provided earlier for the Extension.
target 'BluxNotificationServiceExtension' do
  pod 'BluxClient'
end
Then, run the following command to complete the SDK installation:
cd ios
pod install
Finally, open Xcode and modify the newly created Extension file. Replace the automatically generated code with the following:
import BluxClient

class NotificationService: BluxNotificationServiceExtension {
}
Initialize
To initialize the SDK, provide your Client ID and API Key:
import 'package:blux_flutter/blux_flutter_api_stage.dart';
import 'package:blux_flutter/blux_flutter.dart';

// somewhere in class

final bluxClient = BluxClient();

// ...

bluxClient.initialize(
  bluxApplicationId: "BLUX_APPLICATION_ID",
  bluxAPIKey: "BLUX_API_KEY",
  requestPermissionsOnLaunch: true
);
// ...
User Management
signIn
Sign in a user by passing a unique user ID. Users with the same UserId are treated as the same user by the Blux service.
bluxClient.signIn(userId: 'USER_ID');
signOut
Call this method when a user logs out of your service. It helps improve user identification accuracy.
bluxClient.signOut();
Sending Events
Product Detail View Event
Track when a user views a product detail page or expresses interest in an item.
bluxClient.sendEvent(
    AddProductDetailViewEvent(
      itemId: 'ITEM_ID',
    )
);
Like Event
Track when a user likes or favorites a product or video.
bluxClient.sendEvent(
  AddLikeEvent(
    itemId: 'ITEM_ID',
  )
);
Add to Cart Event
Track when a user adds a product to their shopping cart.
bluxClient.sendEvent(
  AddCartaddEvent(
    itemId: 'ITEM_ID',
  )
);
Order Event
Track when a user purchases a product. Provide the paidAmount as paid amount at the time of the transaction.
Single Product Order Example
BluxClient.sendEvent(
  AddOrderEvent(
    orderId: "ORDER_ID",
    orderAmount: 200,
    paidAmount: 100,
    items: [
      {
        "id": "ITEM_ID",
        "price": 200,
        "quantity": 6
      }
    ]
  )
);
Multiple Products Order Example
BluxClient.sendEvent(
  AddOrderEvent(
    orderAmount: 200,
    paidAmount: 100,
    items: [
      {
        "id": "ITEM_ID_1",
        "price": 200,
        "quantity": 6
      },
      {
        "id": "ITEM_ID_2",
        "price": 300,
        "quantity": 1
      }
    ],
    orderId: "ORDER_ID"
  )
);
Libraries
- blux_flutter
- blux_flutter_api_stage
- blux_flutter_event
- blux_flutter_events/blux_flutter_base_event
- blux_flutter_events/blux_flutter_events
- blux_flutter_method_channel
- blux_flutter_platform_interface
- notifications/blux_notification
- notifications/notification_foreground_will_display_event
- notifications/notification_url_open_options