blux_flutter 0.0.11  blux_flutter: ^0.0.11 copied to clipboard
BluxClient Flutter SDK
Blux Flutter SDK Integration Guide #
Installation #
Using pub #
Add the Blux Flutter SDK to your project's pubspec.yaml file:
dependencies:
  blux_flutter: ^0.0.11
CocoaPods (iOS-specific) #
After adding the SDK, navigate to the ios directory and run the following command to install iOS dependencies:
cd ios
pod install
iOS Project Setup #
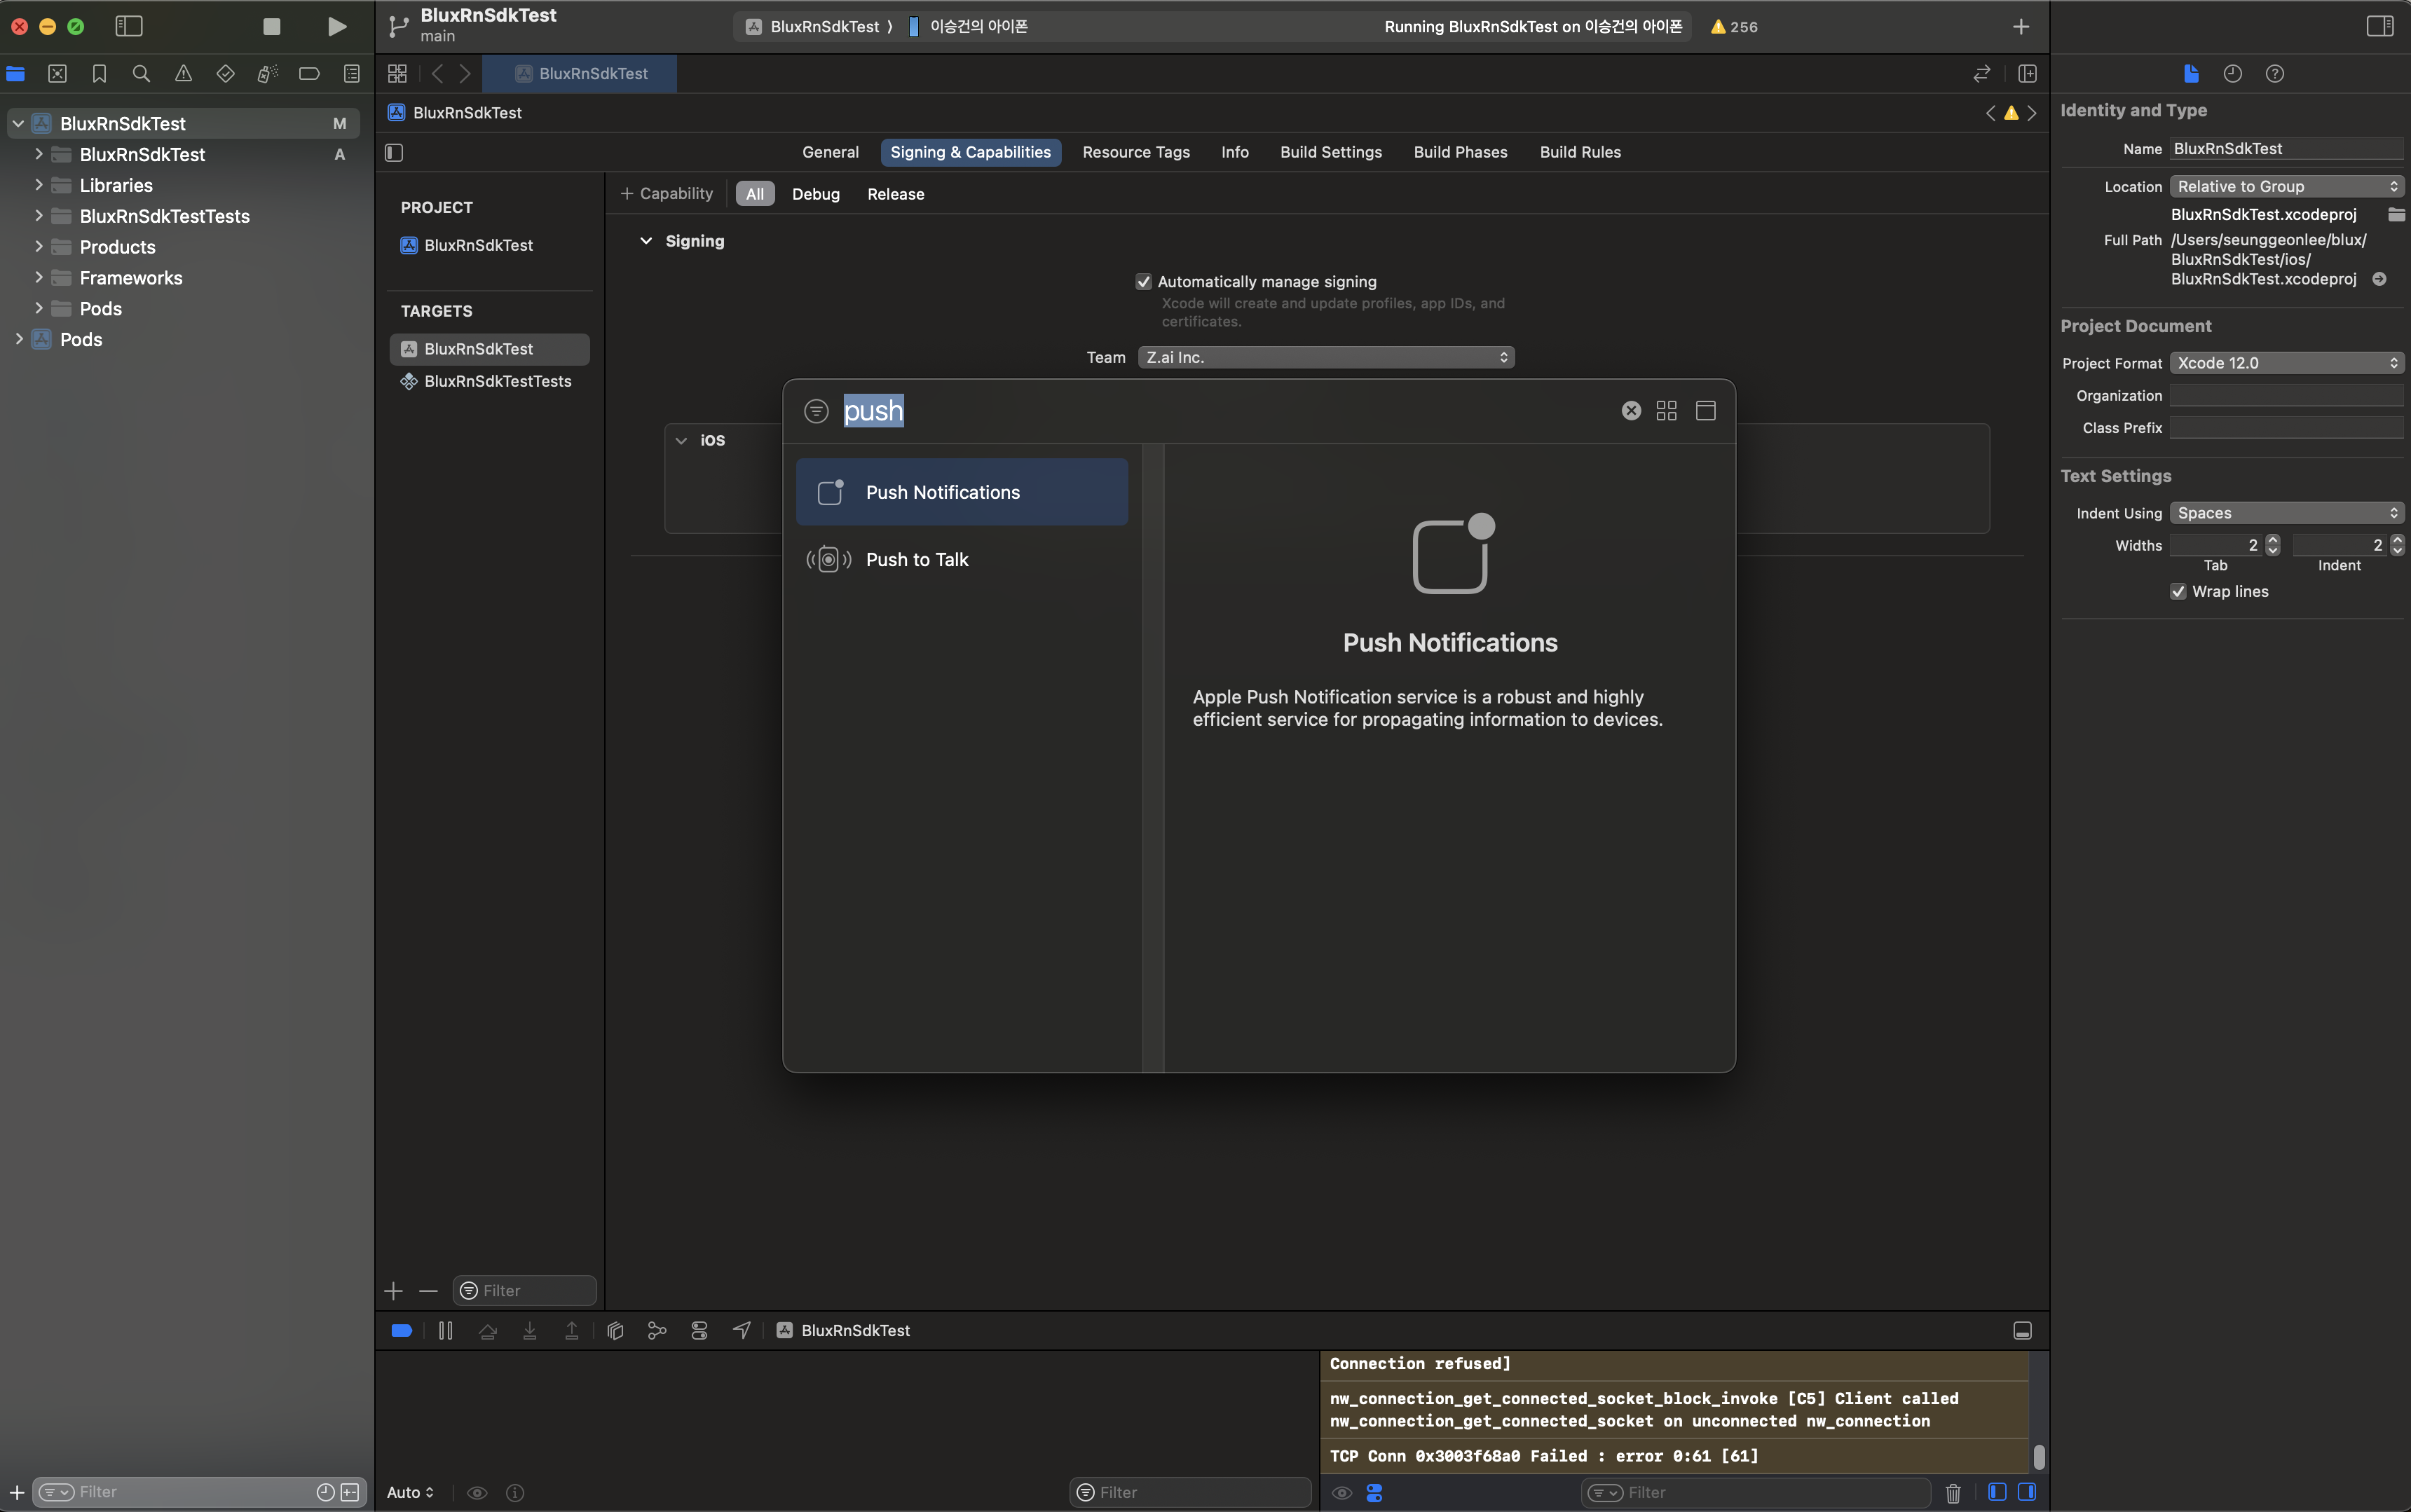
(1) Enable Push Notifications #
Enable push notifications by navigating to your Target's Signing & Capabilities, clicking the "+" button in the top-left corner, and selecting Push Notifications.
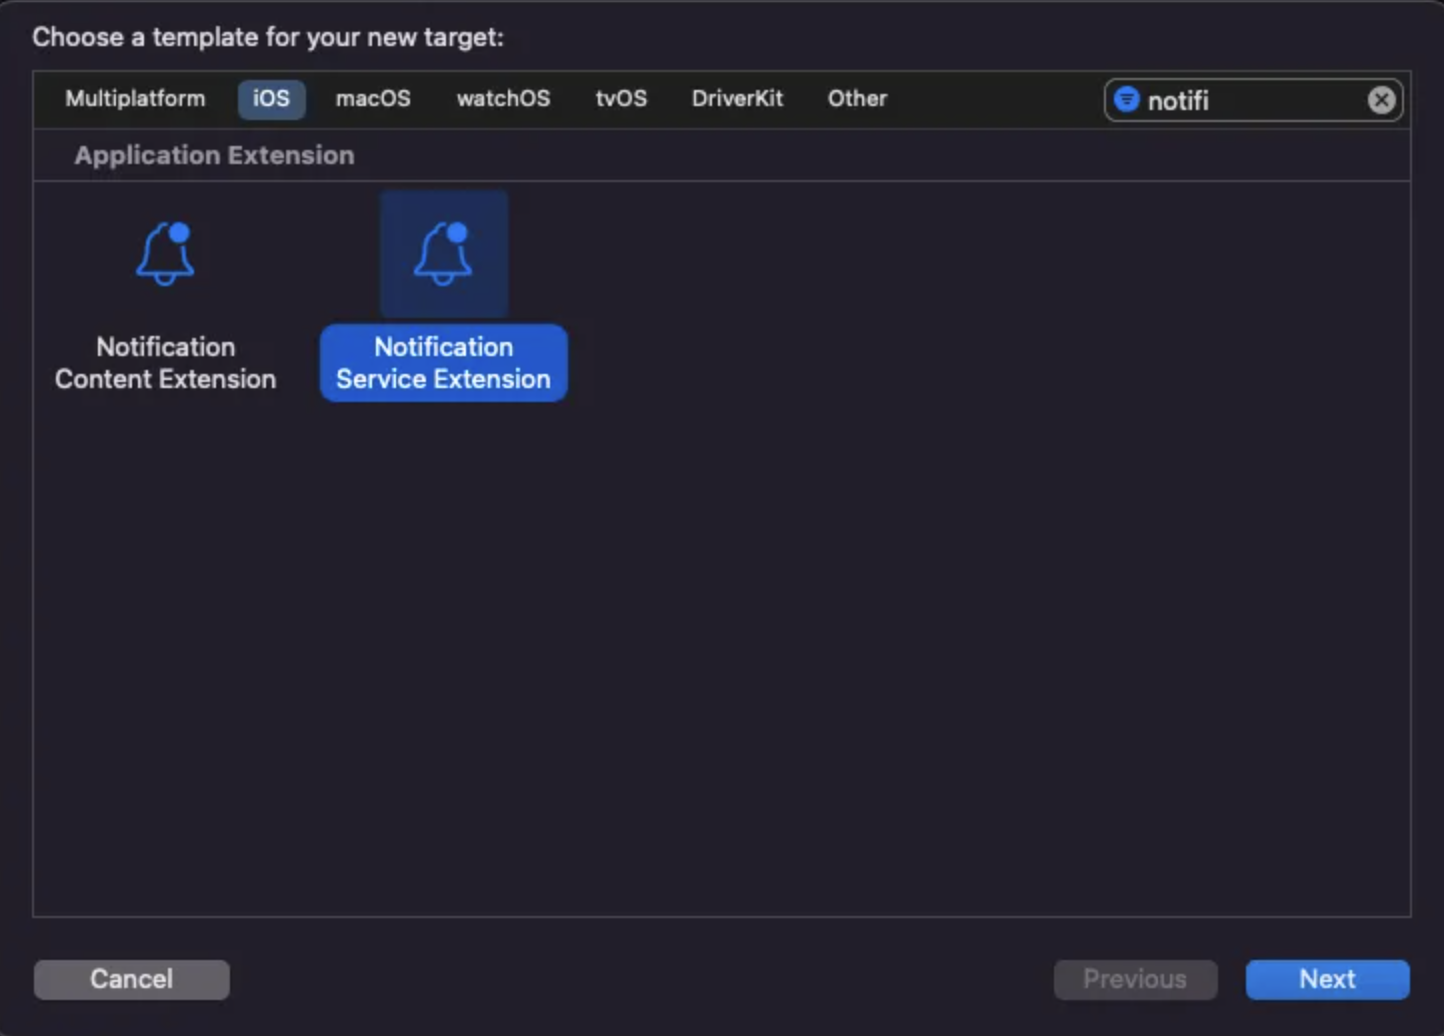
(2) Create a Notification Service Extension #
- In Xcode, go to File > New > Target and select Notification Service Extension.

- Enter an appropriate Product Name and click Finish. We recommend using Swift as the language.
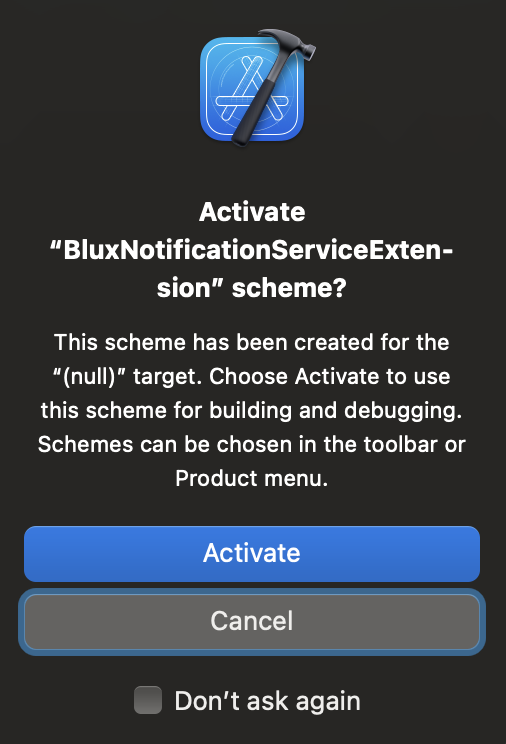
- When prompted with the scheme activation dialog, click Cancel to avoid enabling a separate scheme.
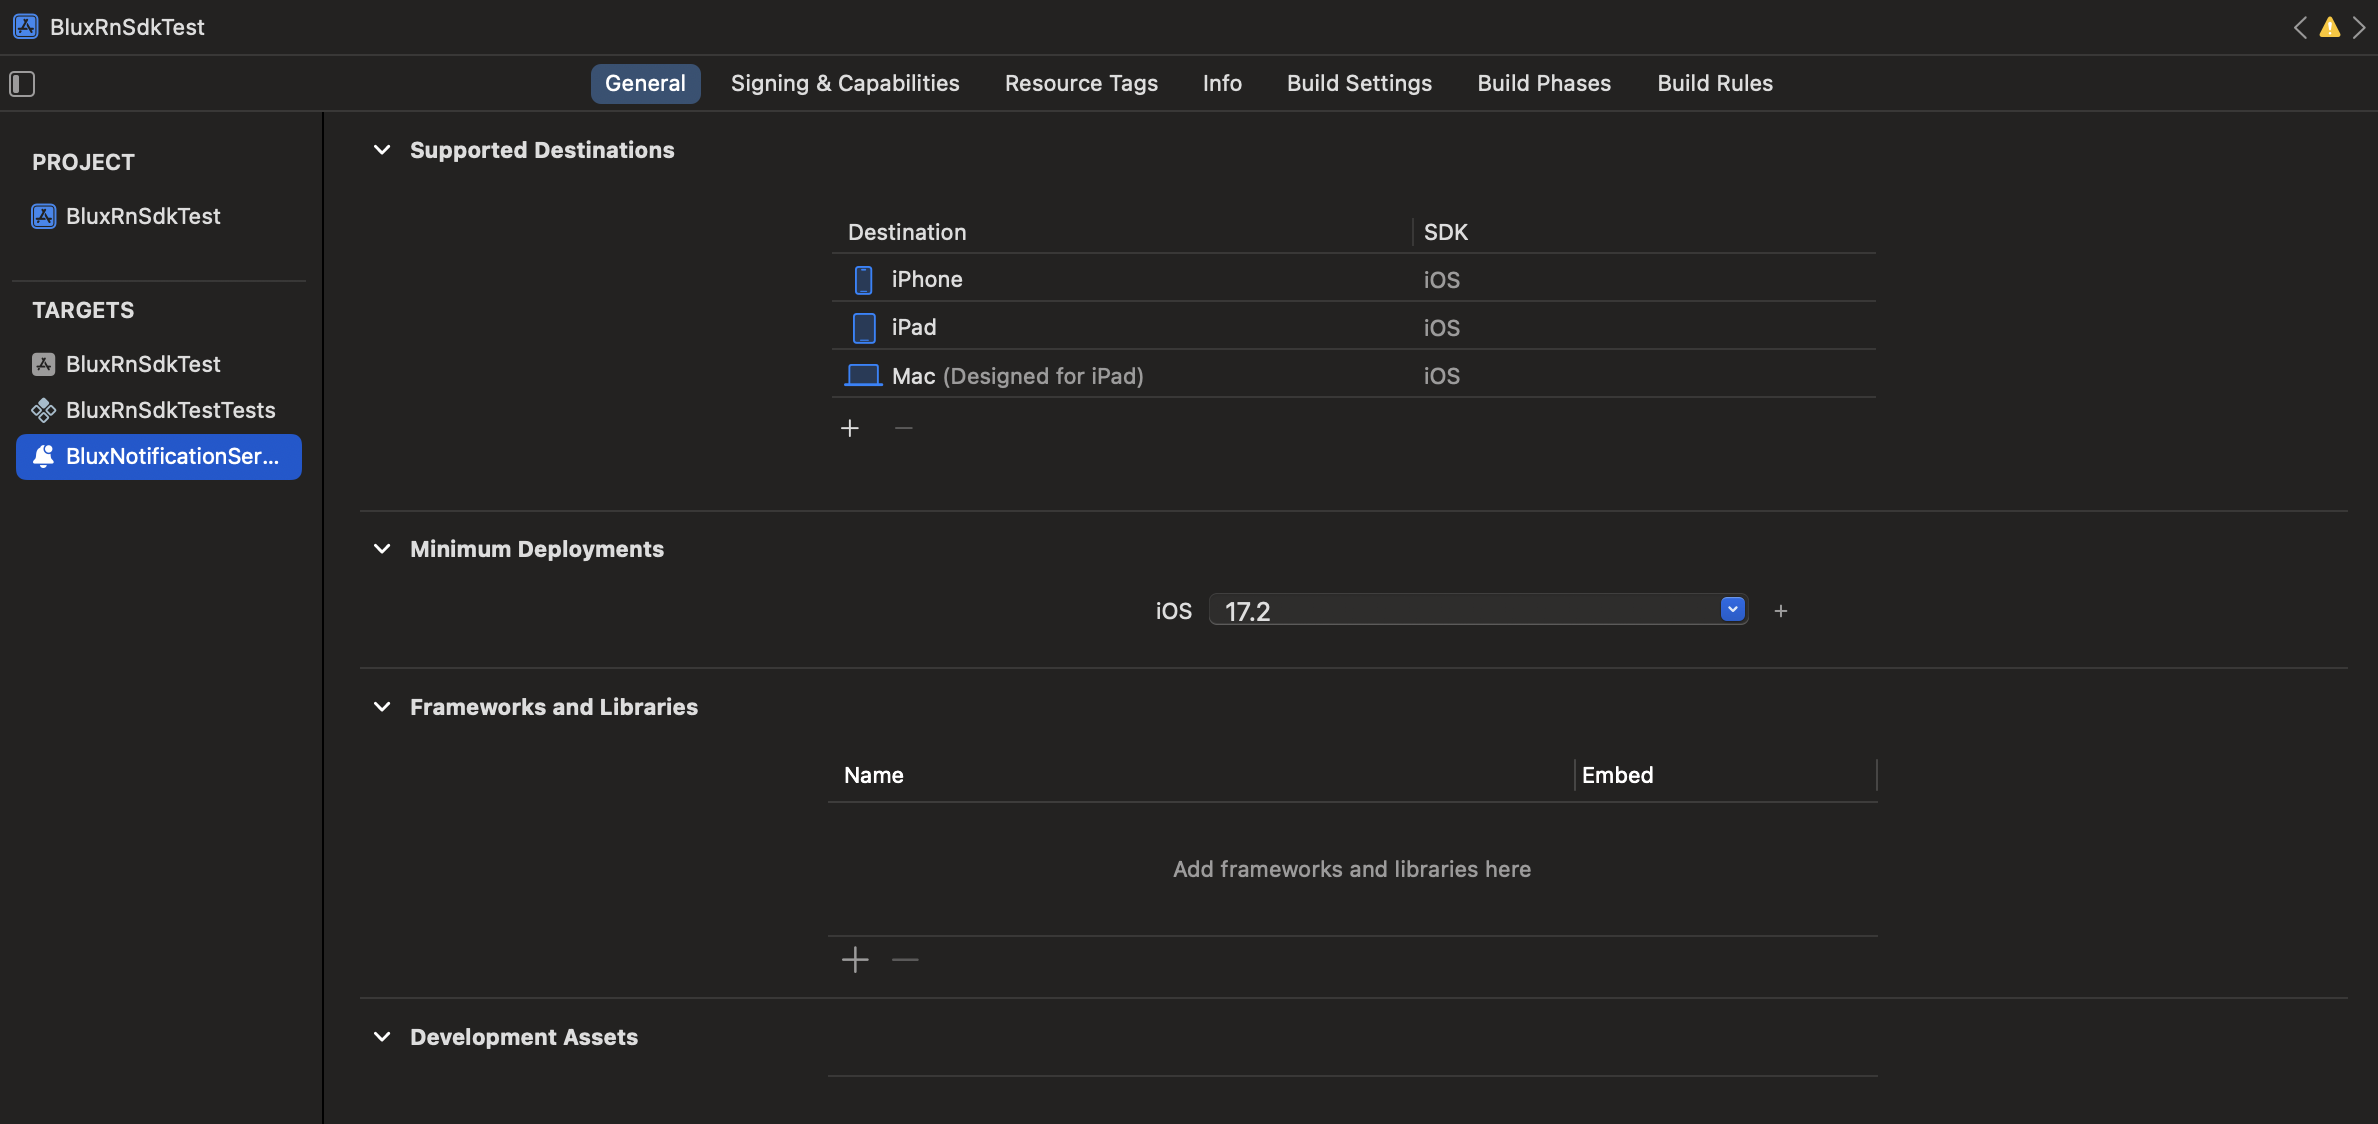
(3) Set Minimum Deployment Version #
Ensure the Minimum Deployment Version for the Notification Service Extension matches the deployment version of your main app's Target.
(4) Modify the Podfile #
Open the Podfile in the ios directory and add the following lines:
# Add the following at the bottom of the file.
# Use the Product Name you provided earlier for the Extension.
target 'BluxNotificationServiceExtension' do
  pod 'BluxClient'
end
Then, run the following command to complete the SDK installation:
cd ios
pod install
Finally, open Xcode and modify the newly created Extension file. Replace the automatically generated code with the following:
import BluxClient

class NotificationService: BluxNotificationServiceExtension {
}
Initialize #
To initialize the SDK, provide your Client ID and API Key:
import 'package:blux_flutter/blux_flutter_api_stage.dart';
import 'package:blux_flutter/blux_flutter.dart';

// somewhere in class

final bluxClient = BluxClient();

// ...

bluxClient.initialize(
  bluxApplicationId: "BLUX_APPLICATION_ID",
  bluxAPIKey: "BLUX_API_KEY",
  requestPermissionsOnLaunch: true
);
// ...
User Management #
signIn #
Sign in a user by passing a unique user ID. Users with the same UserId are treated as the same user by the Blux service.
bluxClient.signIn(userId: 'USER_ID');
signOut #
Call this method when a user logs out of your service. It helps improve user identification accuracy.
bluxClient.signOut();
Sending Events #
Product Detail View Event #
Track when a user views a product detail page or expresses interest in an item.
bluxClient.sendEvent(
    AddProductDetailViewEvent(
      itemId: 'ITEM_ID',
    )
);
Like Event #
Track when a user likes or favorites a product or video.
bluxClient.sendEvent(
  AddLikeEvent(
    itemId: 'ITEM_ID',
  )
);
Add to Cart Event #
Track when a user adds a product to their shopping cart.
bluxClient.sendEvent(
  AddCartaddEvent(
    itemId: 'ITEM_ID',
  )
);
Order Event #
Track when a user purchases a product. Provide the paidAmount as paid amount at the time of the transaction.
Single Product Order Example
BluxClient.sendEvent(
  AddOrderEvent(
    orderId: "ORDER_ID",
    orderAmount: 200,
    paidAmount: 100,
    items: [
      {
        "id": "ITEM_ID",
        "price": 200,
        "quantity": 6
      }
    ]
  )
);
Multiple Products Order Example
BluxClient.sendEvent(
  AddOrderEvent(
    orderAmount: 200,
    paidAmount: 100,
    items: [
      {
        "id": "ITEM_ID_1",
        "price": 200,
        "quantity": 6
      },
      {
        "id": "ITEM_ID_2",
        "price": 300,
        "quantity": 1
      }
    ],
    orderId: "ORDER_ID"
  )
);
Metadata
Publisher
Weekly Downloads
Metadata
BluxClient Flutter SDK
License
![]() unknown (license)
unknown (license)
Dependencies
flutter, plugin_platform_interface, webview_flutter
More
Packages that depend on blux_flutter
Packages that implement blux_flutter